Unit Import: 4-step process for creating child Accounts
Use Salesforce’s native deduplication engine to import unit-level Accounts directly from Restaurantology.
Updated over a week ago
Throughout this article, the terms “unit,” “store,” and “location” are used interchangeably to refer to child-level restaurant records.
Once setup and permissions are configured, Admins can begin importing child Accounts by accessing the Visualforce widget on any matched multi-unit Account.
This process runs on Salesforce’s native deduplication engine and does not require spreadsheets or data loader prep.
[!TIP]
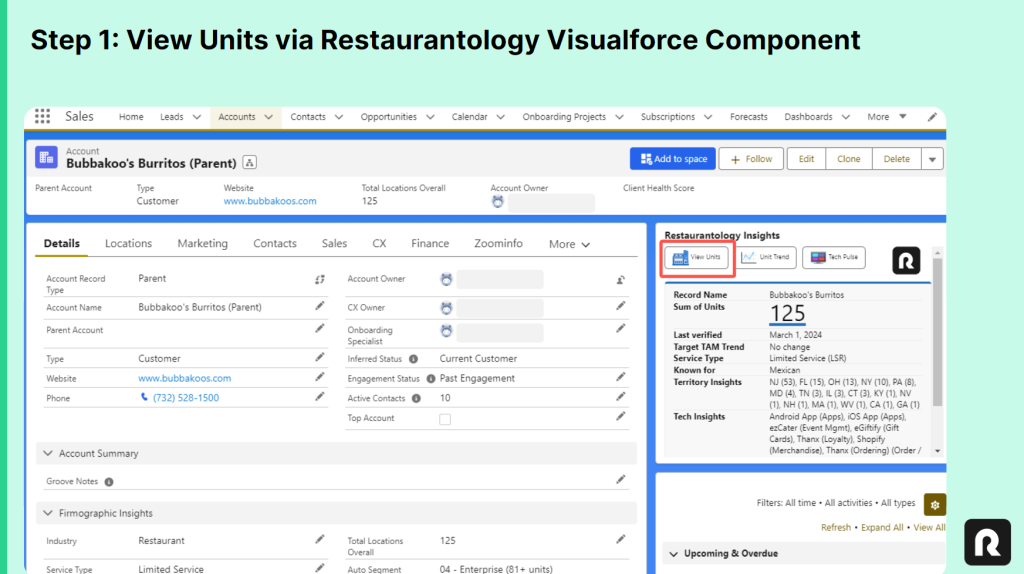
To begin, click View Units from the Restaurantology Visualforce widget on any matched Account.
Step 1: View available units
To view unit-level records for a multi-unit Concept, start from any Account that has already been mapped to a RestaurantologyLog.
- Locate the Restaurantology Insights Visualforce component (
R0_AccountBox). - Click View Units.
This will refresh the page and display a pop-up containing store-level records associated with the Concept. No data is downloaded to your Salesforce instance during this step, it’s a preview-only view.
[!TIP]
Ensure theR0_AccountBoxcomponent is present on your Account layout and that your user profile has the appropriate access to view and interact with the Visualforce widget.
Step 2: Prepare deduplication cache
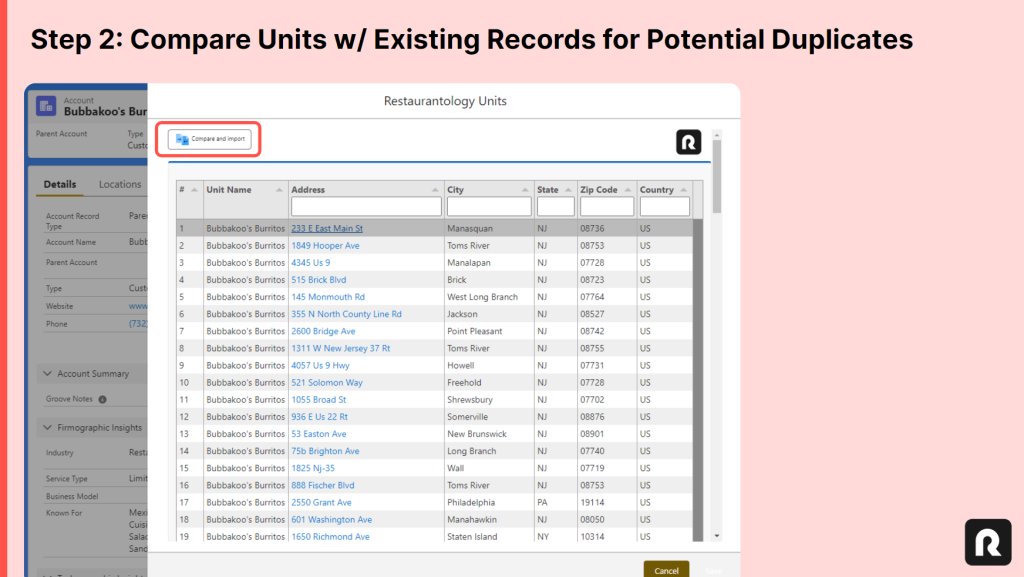
Before importing units, users must initiate a required comparison step that checks for potential duplicates against existing Account records.
- In the View Units pop-up, click Compare and Import.
- This creates a temporary local cache of all unit records associated with the Concept.
- Restaurantology uses Salesforce’s native deduplication engine to identify potential matches.
- Results are stored for your review before any records are created.
This process downloads data into a custom object managed by Restaurantology, but does not create any new Account records. It’s a necessary pre-check to ensure accurate record creation.
[!TIP]
Don’t see the Compare and Import button? You may lack the necessary permissions to perform record imports. Review your Restaurantology import permission settings in the Restaurantology App, or contact your Salesforce admin.
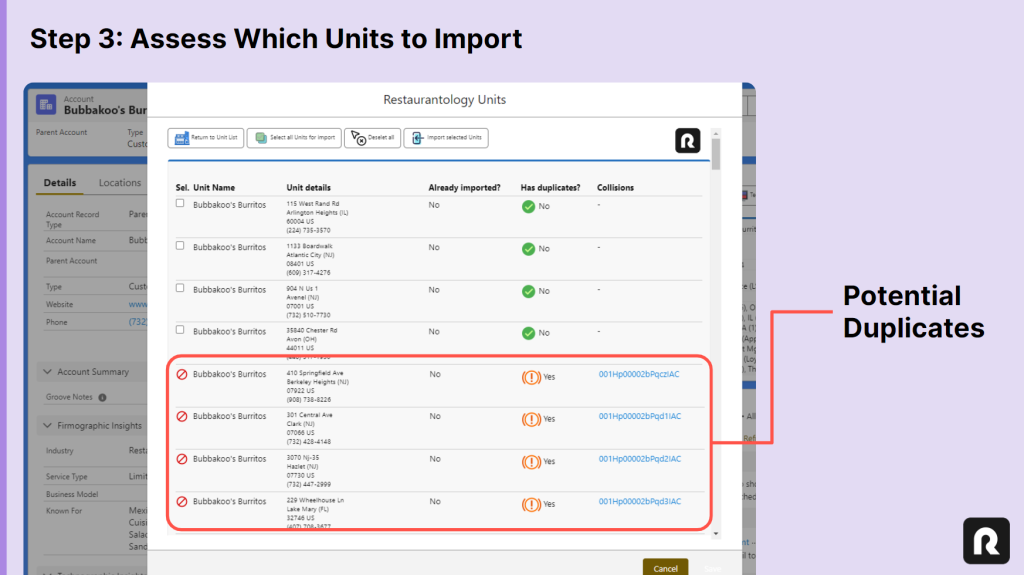
Step 3: Review and select units to import
After the comparison process is complete, users are shown the deduplication results and can review which units are eligible for import.
- Records flagged as potential duplicates by Salesforce will be blocked from import.
- All other units will be available for selection.
If any records are incorrectly flagged, users can take action to improve future results by:
- Updating Account names to improve match accuracy.
- Correcting or completing Billing Address fields.
- Reviewing or adjusting your Salesforce duplicate rules and thresholds.
Each time you click Compare and Import, a new cache is created and the deduplication process runs again. Any updates to records or rules will be reflected in the refreshed results.
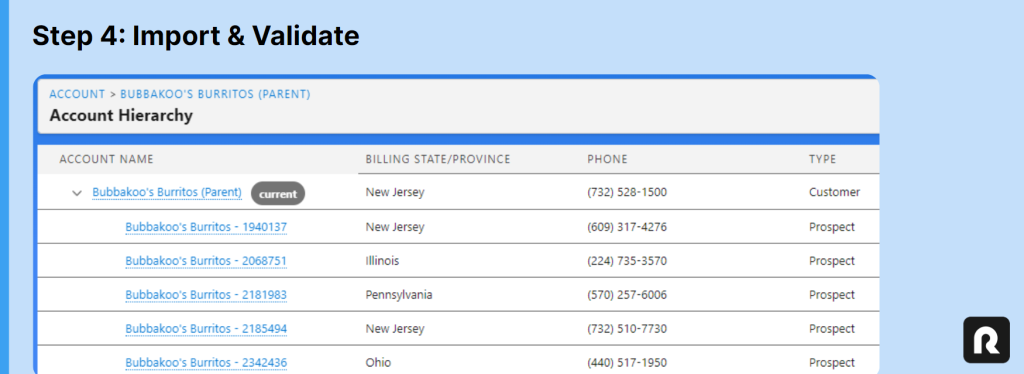
Step 4: Import units a validate results
Once you’ve selected which records to import, click Import Selected Units to complete the process. New records will be created in your Salesforce instance using the standard and custom field mappings configured in Step 3 of the setup article.
[!Important]
Restaurantology uses Salesforce’s insert method when importing Accounts, which bypasses required field validations that might otherwise block record creation. However, any org-specific automation (Flows, Process Builders, Apex Triggers, or managed package logic) may still cause errors if those automations attempt to update fields post-insert.