Step 3: Post-install configurations
Update permissions and customize page layouts to optimize user access to Restaurantology data.
Updated over a week ago
With installation and initial setup complete, the final step is to configure user access and visibility. This includes setting user permissions and customizing Account page layouts so that key Restaurantology insights are visible and actionable.
Two steps to optimize user access to Restaurantology
[01] Update user permissions
Ensure that users can access Restaurantology data and features as intended:
- Review user profiles: Identify which profiles should have access to Restaurantology.
- Set object and field-level permissions: Grant appropriate read, create, edit, or delete access for fields and objects.
- Define record-level visibility: Confirm that users can see the data relevant to their roles.
[!TIP]
Permissions can be adjusted at any time to reflect changing team needs.
[02] Update Account page layouts
Customize relevant Account layouts to surface Restaurantology components:
- Identify target layouts: Determine which Account layouts will benefit from Restaurantology insights.
- Add components: Incorporate fields, reports, Visualforce widgets, and logs into the layout.
- Test and publish: Validate the layout updates, then release to your users.
[!TIP]
Use Salesforce’s Page Layout Editor or Lightning App Builder for drag-and-drop editing.
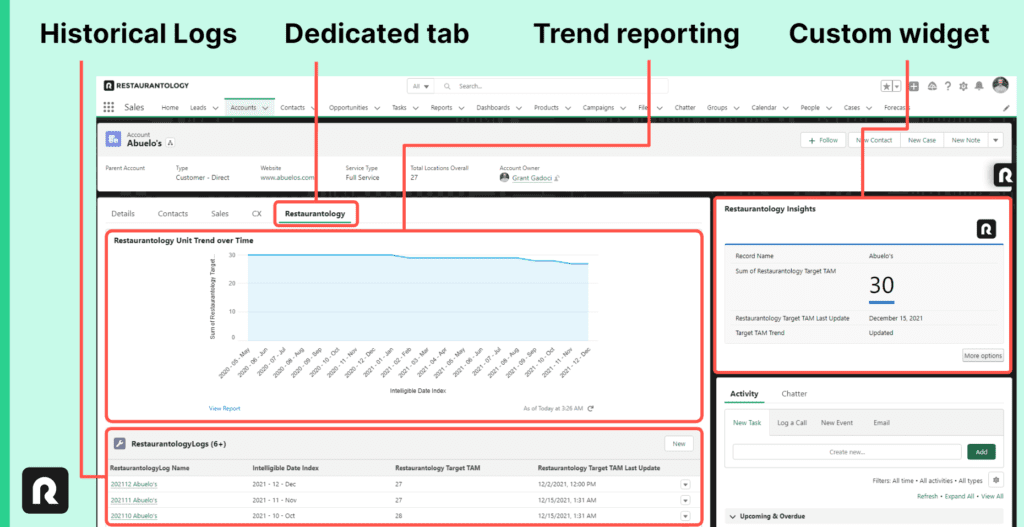
Recommended Account page layout
Restaurantology recommends adding four components to any Account layout that leverages its data:
- Tab: Create a dedicated sub-tab for Restaurantology insights.
- Report: Embed the “Restaurantology Unit Trend over Time” report for quick data visualization.
- Widget: Add the custom Visualforce component (
R0_AccountBox) to centralize key indicators. - Logs: Include a related list of
RestaurantologyLogsfor historical reference.
Steps to reproduce
- Create a Restaurantology tab on the Account layout. Add:
- The “Restaurantology Unit Trend over Time” Salesforce Report, filtered by “Account Name: Account ID”.
- A Dynamic Related List: Single for RestaurantologyLogs. Suggested columns: Name, Intelligible Date Index, Target TAM, Target TAM Last Update, Is Managed. Sort by Intelligible Date Index (descending).
- Add the Visualforce widget:
- Label it (optional): “Restaurantology Insights.”
- Admins can customize this component via App Center > Setup for Admins and Experts > Appearance.
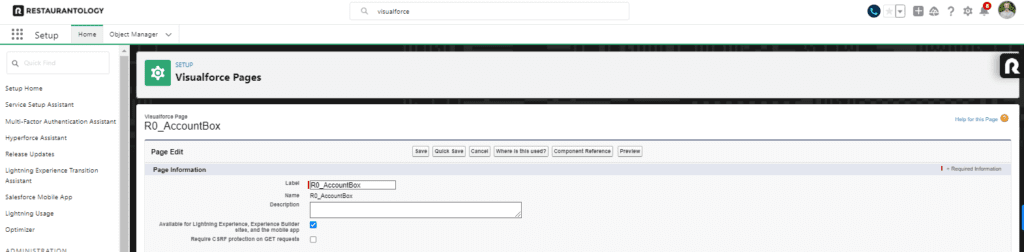
[!TROUBLESHOOTING]
To enable the Visualforce component in Lightning Experience, navigate to Setup > Visualforce Pages, findR0_AccountBox, click Edit, and check the box for “Available for Lightning Experience, Experience Builder sites, and the mobile app.”
Next, continue to Help and advanced troubleshooting →